Search Results
15 results found with an empty search
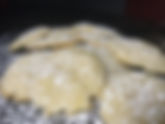
- (Practically) Healthy Lemon Cookies!
Hello, For those of you who don't know this, Oliva is my best friend and the person this (kind of) bakery is named after. She is always challenging me in everything I do and the absolute light in my life. Recently, she has been put on a no dairy no sugar no gluten diet which makes sweets hard to eat because they tend to have at least one of those, if not all three, which is upsetting because she also loves a good dessert. She had been eyeing these lemon cookies she saw on Pinterest (which I didn't realise were already in compliance with her diet) and I'd been saying for months that I wanted to mess around with things she could eat and make something delicious so what better a time then now to try it out? It took a little brainstorming but I got to a recipe that I thought might work with almond flour, coconut oil, and monkfruit sweetner, so then it was test kitchen time! All of you on my snap chat know how that went, the first one was gross so I threw baking soda out of the mix. The second wasn't as bad, but it kept spreading. Fridging the dough didn't help at all, they all just ended up spreading in the oven. I needed less liquid so instead of lemon juice and zest, I only did zest. Cornstarch was a no go to make it stiffer, it detracted from the taste. Finally I hit on a combination with baking powder and less coconut oil that worked out well! She asked for soft and chewy and I managed to get the soft part (it stayed soft after cooling) but the chewy part wasn't going to happen because of the flour. It ended up being a slightly shortbreadish texture but lighter. Melt in your mouth is a good way to put it. I'll talk a little more about the different types of flour and fats at the bottom of the recipes should you want to read :). I love you Oliva, I'll try and make this recipe as precise as I can. I know how you love exact measurements. TMADJJ Practically Healthy Lemon Cookies Yields 24 cookies Ingredients: 1 egg zest of 2 lemons 2/3 cup monkfruit sweetner 7 tsp coconut oil (can't be wet, has to be the congealed version. If it's not, stick it in the fridge until it is) 1 1/2 cups almond flour 2 tsp baking powder 1.5 tsp vanilla salt, you're going to have to trust your instincts on this part Recipe: Okay. You got this. Preheat the oven to 300°F. Also you need an electric whisk for this because I tried it with a handheld one and I think that's part of the reason the first one looked like cake batter. In a bowl, combine the coconut oil and monkfruit sweetner and whisk until it looks fluffy. Next, add the vanilla and egg and whisk again until it looks a pale yellow and still pretty fluffy. If it's liquidy, the oil wasn't solid enough. In a separate bowl, mix the almond flour, baking powder, and a little salt (or keep the salt until the end and then add it to taste). Pour in the wet ingredients and whisk those together. With a spatula, combine the lemon zest into the dough. The reason for the spatula is you want to gently fold it to keep as much air in there as possible. Create small balls about the size of a waterbottle cap and lay them relatively far apart from each other on a baking sheet, because remember they spread. Bake them for ten minutes. What you're looking for is the middle not to jiggle but it will look not completely done when you take it out. Basically right once that middle is no longer liquid you're good to go, which should be just at the ten minute mark. The edges may brown slightly but we aren't looking for a golden brown because of the monkfruit sweetner and the fact that this is a sugar cookie base. Let them cool for about ten minutes and then they should hold their shape and be ready to eat! About the flour and fat! So here's the tea. Different flours have different levels of protein which is why you may use all purpose flour for most things but a bread flour for bread or cake flour for cake. Cake flour has a lower protein content, around 9%, which is good because lower the protein, the less gluten that will form. Gluten is what makes something stretchy and chewy, so it makes sense that bread flour has about 13% protein. All purpose runs at around 11% which is what makes it so versatile because it's kinda in the middle of all of these. Also, the higher the protein content, the heavier the dough will be. The choices for gluten free flours for this recipe were coconut (18%) and almond flour (6%). So coconut would have made a very dense cookie whereas the almond made it light and airy. Unfortunately, it also added to the crumbly texture because absolutely no gluten was made and so therefore we also couldn't get a chewy consistency. On the fat side of things, usually one uses butter. The fat content in butter is around 80% with the other 20% being water. Coconut oil is 100% fat which means those were not going to act the same. To make 100% equal 80%, you have to use considerably less coconut oil which is what the problem was with the first batch I made. Coconut oil also has a lower melting point (75°F) than butter (95°F) so it is going to cook faster, hence the 300°F oven rather than the usual baking temp for cookies at 350°F.
- Worst Thing I Ever Did Was Become a Broke College Kid
Hi mom, I was watching Great British Bake Off and was very jealous of the bakers getting to make things. Knowing full well that I had already spent my alloted monthly funds on rent and a giant bowl of pineapple I decided to splurge and really break the bank to try a new recipe I've been thinking about. Also, there's a boy at my new job who is pretty so I'm bringing them into work in a vain attempt to make friends because wow I didn't ever think making friends was hard but apparently I'm not very good at it. The new recipe was really a gamble because it uses home made caramel which I wasn't sure was going to work out. Good news! It did and let me tell you, it is not something you need to be scared of. If I can do it, you sure as hell can. Also also, I got called into work halfway through baking off the cupcakes so I can also say that you can fridge your batter overnight and bake them off the next day and there are zero adverse affects. Alright, on to the recipe! Love, me ps the recipe is spiced apple cupcakes with homemade caramel and a spiced cream cheese frosting sorry i didn't say that earlier Spiced apple cupcakes! Yields 29 ish Ingredients: 2 sticks mostly melted and then cooled unsalted butter 1 1/3 cups brown sugar (dark or light, i used dark) 2/3 cup granulated sug 4 eggs, room temp (important my dudes that it's room temp) 2/3 cup milk gingerbread or chai tea 3 tsp vanilla extract 3 cups all purpose flour (don't use a different kind of flour unless it's gluten free but no cake flour) 2 tsp baking soda 2 1/2 tsp baking powder 1 tbs fresh grated ginger salt pumpky pie spice 1 1/2 apples (you'll want to set aside the extra apple half for dipping in the caramel) Recipe! Preheat your oven to 350. Melt your butter if you haven't already done so, then whisk with the two sugars. Add in your eggs one by one, incorporating them completely before putting in the next. In a saucepan, heat up your milk with the tea of your choosing, I used the gingerbread because that was all I had, but chai will also work. You want to infuse the flavour into the milk and you can kinda test this by tasting the milk. Strain out the tea if you're using looseleaf or take out the tea bag if you're not and add the milk and vanilla to the sugar mix. Put this all aside and get out another bowl for your dry ingredients. Combine your flour, baking soda, and baking powder. The reason you're using all purpose flour is because it's a fruit batter and if you use cake flour or something else like that, it's too light and will make the fruit sink to the bottom instead of being evenly spread throughout. Also if you ever wanted to know the difference between baking soda and powder I'll add it after this section of the recipe. Add a third of your wet ingredients to the dry mix and whisk. Do this with the rest of your batter, whisking after each addition. Don't over mix, just do it until you can't see the flour anymore. Add a little bit of salt and your pumpkin pie spice. I'm not entirely sure how much I put in, maybe like a tablespoon? I just tasted it until it was right. If you don't have any, you can add some nutmeg, cinnamon, cloves, and all spice. Put in your ginger too. Cut your apples into smallish cubes and fold them into your batter. Line a cupcake pan with the little paper thingies and pour your batter into them, filling each about 2/3 full. Bake them for 20 minutes, rotating them halfway through. Note that because there is fruit in this, you can't accurately do the toothpick test. Instead, lightly prod it with your finger and if the cupcake bounces back, then it's done. If most of them are doing this but there are one or two that don't, take it out anyway, it'll finish cooking out of the oven. Baking powder vs soda: Both are similar as they're raising agents, but the chemical make up is super different. Basically, baking soda is a base and powder contains baking soda but can sometimes not completley do the job by itself. If baking soda is used in a recipe, the recipe will also call for an acid to neutralise it. If not, it will leave a metallic taste in your mouth. Baking powder is usually sold as double acting, so it does its first chemical reaction when added to the batter and the second when it's heated. Baking powder is baking soda combined with cream of tartar (an acid). Baking soda is stronger than powder but powder is usually in a recipe without an acid. Note: brown sugar is considered an acid. Good rule of thumb: 1/4 tsp baking soda per cup of flour and 1 tsp baking powder per cup of flour Salted Caramel! Yields way more than you need but can be stored in the fridge! Ingredients: 6 tbs cubed salted butter 1 cup granulated sugar 1/2 cup heavy cream salt Recipe: Heat the sugar in a pot over medium heat, stirring constantly. This part will take a while to complete, but basically what you're going to see is it will start clumping and as it melts, it will become a dark brown glossy sauce. Be careful not to burn it, and if it seems like it's not working, give it time. Mine took probably 7 minutes to melt. Don't turn up the heat, if anything, you may need to turn it down. Once it has completely melted, add your butter and stir until it's melted and combined. It will bubble so be careful. When it's melted, pour in your heavy cream slowly as you stir and again it's going to bubble. Let it boil for a minute and then transfer it to a clean bowl or an ice bath so it stops cooking. Salt it to taste, I probably used a teaspoon and a half. Let it cool, it will thicken then. Spiced Creamcheese Frosting: Yields: just enough Ingredients: 8 oz block of cream cheese (surprise surprise) 3 cups of powdered sugar salt, again 1 stick of room temp butter, unsalted pumpkin pie spice again 1 tsp vanilla Recipe: Whip your butter and cream cheese until fluffy and slowly add in your powdered sugar. Add the vanilla and some salt and pumpkin pie spice to taste. Maybe a teaspoon? Fridge it if you're not going to use it for a bit. Construction! Allow your cupcakes to cool entirely before doing anything else. I put a caramel layer on top of the cupcake and then piped the frosting on with a star tip and then added more caramel in a drizzle but really guys, just do what makes you happy.
- Escapism Techniques When Fall isn't Fall Enough
Hello my one reader (aka me when I forget this recipe), It's the end of September and I wanted to do some fall things to will in the cold weather that seems to be nonexistant in Florida but has already arrived every where else. I also just made a new pen pal who is from Italy and wanted to show him what I could do with my baking, so I thought why not go apple picking? Turns out that much like cold weather, apple trees don't reside here either. Understandably, I was bummed. But I was determined to make a pie and when looking up the fruits that are in season in fall, two that were listed were pears and pomegranate. Wait maybe I'm making up the pomegranate part but either way pear was definitely on there and badabing badaboom I decided to go with an apple pear and pomegranate pie. This recipe is super easy and only takes a few hours so I would suggest giving it a go, especially for those of you that don't like the gooey bit in store bought apple pies. This is perfect for Thanksgiving and Halloween and Christmas and literally any time because you can't go wrong with an apple pie. I know future me didn't read this part so if anyone else actually did, thanks. Love, TMADJJ Crust THIS MAKES ENOUGH FOR A BOTTOM AND TOP CRUST if you want a single crust cut the recipe in half Ingredients: 4 cups all purpose flour 1 tbs kosher salt 2 tbs caster sugar 20 tbs (2.5 sticks) of unsalted butter, cut into thin slabs and frozen (the frozen bit is important) 2.5 tbs sour cream ice water 1 pomegranate. Recipe: Open your pomegranate and take out all the seeds, sticking them in a food processor. This is a pain in the ass so if you have pom seed just laying around in your supermarket you could get those instead. Blend them up with your food processor and then strain the juice from the leftover seed debris into a bowl and set it aside. Incorporate the flour, sugar, and salt. Just like alcohol, sugar slows gluten from forming. Put your butter in there and start combining it with the flour using your fingertips. The goal is to make it crumbly looking. It's very important you don't let the butter get soft so if it's taking too long to combine, stick it in the fridge for ten minutes and then go at it again. This process is called cutting. You might think that this would be a good job for a food processor and while you can start it in that, don't let it completely combine in there, you'll get crumbles instead of flakes in your crust. Once that is all mixed up, I put mine in the fridge for 20 minutes to make sure it stays cold. Cold is the key to all of this y'all, if it melts prematurely you don't get air pockets in the oven. While this is chilling, mix 1 tablespoon pomegranate juice into the water and leave what's left of the juice to the side for the filling. Take your bowl of butter and flour out of the fridge and add the sour cream then, tablespoon by tablespoon, add the water. Remember, you want to use as little moisture as possible. The consistency your're looking for is it holds if you squeeze the dough in your hand but it doesn't look wet or like play-doh. Crumbly but pliable. Once it hits that stage, dump it onto a work surface and start bringing it together until it's a cohesive dough and shape it into a disc. Cover in cling film and put it in the fridge. You can chill it for up to four days but I'd do it for at least an hour. Filling Ingredients: 3 ripe pears, thinly sliced 2 granny smith apples, thinly sliced 2 pink lady apples, thinly sliced 3/4 tsp nutmeg 3/4 tsp cinnamon 1 cup brown sugar 3.5 tbs cornstarch 2 tbs butter kosher salt 1 lemon Recipe: Okay so for this, I did the pears macerated, which just means I drew the moisture out of them and turned that juice into a caramelly looking saucy goo to go in the pie. So to macerate, you're gonna take all the pears and put them into a bowl with the brown sugar (you can use regular sugar, I just like the richness of the brown sugar), pinch of salt and 1.5 tbs of cornstarch. Toss them all together so they are completely covered and then leave them to sit for 45 minutes and let the moisture collect. While that's doing its thing, slice your apples and put them all in a bowl with the juice from one lemon. Once that's over, drain the liquid into a pot and set the pears aside. In the pot, bring all of that to a simmer and add nutmeg, your leftover pomegranate juice, and cinnamon. Combine the remaining 2 tbs of cornstarch with equal parts water and create a slurry out of that, then add it to the saucepan. Bring it to a boil so it thickens and becomes the consistency of caramel syrup. Add the butter and then bring it off the heat once it melts. Toss the apples in this deliciousness and set it aside while we make the base of the pie. Assembly Okay here we go. First preheat your oven to 400° Farenheit. You're gonna take your pie crust and half it and roll it out into a large thin circle that will fit your pie tin. Lay it in and press it down so it's completely relaxed in the edges and some should still be hanging over the rim of the dish. Brush with an egg wash (1 egg mixed with water) and put it aside. But not really because next step is to put in your pears at the bottom of the pie and lay them as flat as possible. Now add your apples, arranging them nicely or not they just gotta be flat folks. That's pretty much it, you can bake it like that but if you have the second half you can decorate any way you'd like just make sure you have some sort of slit or ventilation that will allow steam to come out. If you need extra guidance on this go take a look at the peach pie assembly instructions. Happy eating :)
- The Best Way to Make Friends is with Food
Reader! It's always a struggle to meet new people (in my case neighbours) and I'm left wondering what can I bring to introduce myself and immediately connect the image of me with something positive. Every single time I come to the conclusion I ought to bring food and that it needs to be something you don't have to cut into and can be given out separately. I also just got a job at a cafe that said they may want to sell my baked goods, so I wanted to practice my piping skills. I'm about 500% ready to move to a different country and open a bakery and these made me really excited! So here you go, have a fun! Love, me Honey Vanilla Cupcakes Yields: 24 cupcakes Ingredients: 2 2/3 cups all purpose flour 3 tsp baking powder 1 cup softened unsalted butter 1 1/2 cup granulated sugar 1/2 cup brown sugar 2 eggs 1/2 cup sour cream or greek yogurt 1.5 cups heavy cream 2 tbsp honey 2 tbsp vanilla extract Recipe: Preheat oven to 350 farenheit. Take the softened butter and beat it until it's light and fluffy, then add the sugar. Honestly, you can use just granulated sugar, but I think the brown sugar has that richness that granulated doesn't, as well as adding more moisture. Whip the heavy cream to soft peaks. Alternate adding the flour and heavy cream and mix until fully combined. Whip egg whites into stiff peaks. Add egg yolks, baking powder, sour cream, honey, and vanilla, and beat until smooth. Fold egg whites into the batter. Spoon batter into cupcake liners, make them about three quarters full and then bake for roughly 20 minutes or until toothpick comes out clean. Leave to cool for 20-30 minutes before adding the frosting. Strawberry Buttercream Frosting Ingredients: 1.5 sticks Softened Unsalted Butter 3 cups Powdered Sugar 1.5 tsp Vanilla Extract 1/4 cup Heavy Whipping Cream Strawberry extract (you can find this at walmart) A small bag of white chocolate candy melts Recipe: Whip your butter until it's light and fluffy and then add in your powdered sugar in spoonfuls. This may sound tedious but it prevents lumpiness. Add your vanilla extract and about 1 cap full of the strawberry extract (about 1/4 tsp). Taste it to see if you need more. The next part is about consistency, so look at your frosting and if it just looks like butter and it's not entirely cohesive and like a mousse (thicker than pudding), add a little bit of whipping cream until you get that. It shouldn't take more than 1/4 cup. Add in your choice of gel food colouring. Next, put whatever tip you want to use into your piping bag (I used a wilton rose tip) and fill it with your frosting. Chill that in the fridge for 5 minutes and then pipe your roses. If your roses start to look runny as you're piping them, stick your frosting back in the fridge because that is just a result of the butter melting. Put the cupcakes in the fridge for 15 minutes or freezer for 5 while you get the leaves bit ready. Melt a quarter of the candy melts in the microwave for 30 seconds and stir and then back in the microwave for another 30 seconds. It's extremely important that you make sure it's completely melted and there are zero lumps, otherwise it will be impossible to pipe. Add green food gel and put in a piping bag with a leaf tip, which kinda looks like inverse brackets {}. Pipe inbetween your roses and just whatever you think looks good! Leave in the fridge for the chocolate to set up for 10 minutes and then you're good to serve it : )
- Life's a Peach
Last one for today, I promise. Anyone who has talked to me recently knows that I've been craving peach pie since January. I've just had to wait for peaches to come into season and finally! They're here!! So we got a case of them and I spent three hours researching the science behind pies. It's very exciting to me that on my university's database there are actually academic papers on this. The things that I've learned: 1. Pie crust isn't that hard. You need a fat, flour, and water. Which fat to use is highly debated over, but you want it to be a solid fat, like shortening or butter. Butter is good because it's got the best taste, whereas shortening is easier to work with but doesn't taste as good. 2. The reason pie crust is flaky is because the flour encases the fat and then when it bakes, the fat melts and leaves those beautiful air pockets. If you make the fat pieces too small and over work the dough, it becomes crumbly instead of flaky. 3. You want to use as little moisture as possible for the dough, otherwise you develop too much gluten which makes the crust chewy rather than tender and that's just not what you look for in a pie. A good way to get around this is to use some water and some alcohol to bind it all, because alcohol is an inhibitor when the formation of gluten is involved. Most people will prefer to use vodka because you don't effect the taste of the crust but in my recipe we're using bourbon. However, feel free to get creative! Okay enough of the learning, I'll sprinkle in a bit more later but for now, let's get baking! For the purposes of this recipe, it's a peach pie but you can really use any fruit and keep the exact same recipe! Love, TMADJJ Crust THIS MAKES ENOUGH FOR A BOTTOM AND TOP CRUST if you want a single crust cut the recipe in half Ingredients: 4 cups all purpose flour 1 tbs kosher salt 2 tbs caster sugar 20 tbs (2.5 sticks) of unsalted butter, cut into thin slabs and frozen (the frozen bit is important) 2 egg yolks ice water iced bourbon (remember, you can change this out or only use water if you want) Recipe: Incorporate the flour, sugar, and salt. Just like the alcohol, sugar slows gluten from forming. Put your butter in there and start combining it with the flour using your fingertips. The goal is to make it crumbly looking. It's very important you don't let the butter get soft so if it's taking too long to combine, stick it in the fridge for ten minutes and then go at it again. This process is called cutting. You might think that this would be a good job for a food processor and while you can start it in that, don't let it completely combine in there, you'll get crumbles instead of flakes in your crust. Once that is all mixed up, I put mine in the fridge for 20 minutes to make sure it stays cold. Cold is the key to all of this y'all, if it melts prematurely you don't get air pockets in the oven. While this is chilling, mix the egg yolks into the water. The egg yolks aren't necessarily needed, but it does add a richness to the crust. Take your bowl of butter and flour out of the fridge and tablespoon by tablespoon alternate adding bourbon and water. Again, you don't need to do bourbon, I just did it because I thought the taste would pair nicely with peaches and I think I did a three to one ratio of water to bourbon. And remember, you want to use as little moisture as possible. The consistency your're looking for is it holds if you squeeze the dough in your hand but it doesn't look wet or like play-doh. Crumbly but pliable. Once it hits that stage, dump it onto a work surface and start bringing it together until it's a cohesive dough and shape it into a disc. Cover in cling film and put it in the fridge. You can chill it for up to four days but I'd do it for at least an hour. Filling Ingredients: 7 thinly sliced peaches 3/4 tsp nutmeg 3/4 tsp cinnamon 1 cup brown sugar 3 tbs cornstarch 2 tbs butter kosher salt 1 1/2 tbs lemon juice Recipe: Okay so for this, I did half of the peaches macerated, which just means I drew the moisture out of them and turned that juice into a caramelly looking saucy goo to go in the pie. By no means do you have to do this, you could just ignore the bit about cornstarch and butter and just toss your peaches in the rest of the ingredients, or you could macerate all of them and make it completely gooey. I like the half and half because you still get that gooey goodness as well as the texture of the fresh peaches that still have their moisture. So to macerate, you're gonna take 4 of your peaches and put them into a bowl with the brown sugar (you can use regular sugar, I just like the richness of the brown sugar), pinch of salt and 1.5 tbs of cornstarch. Toss them all together so the peaches are completely covered and then leave them to sit for 45 minutes and let the moisture collect. Once that's over, drain the liquid into a pot and set the peaches aside. In the pot, bring all of that to a simmer and add nutmeg, cinnamon, and lemon juice. Combine the remaining 1.5 tbs of cornstarch with equal parts water and create a slurry out of that, then add it to the saucepan. Bring it to a boil so it thickens and becomes the consistency of caramel syrup. Add the butter and then bring it off the heat once it melts. Assembly: Preheat the oven to 400 Farenheit. Roll out half of your dough into a large circle so it can cover the whole pie dish and has some hanging over the sides. Oh by the way, you want your pie dish to ideally be glass or metal, because it heats more evenly and faster. Ceramic is okay, but if you do that, you want to put it on a cookie sheet that has already been in the oven for 10 minutes. Once your bottom crust is rolled out, cut off some of the excess overhang, but not all of it. You want to still have enough left over to fold it under itself. The crust needs to be pushed into the bottom of the pan, all the way into the edges because if it's not in there entirely you're going to get a soggy bottom. Brush the crust with an egg wash, it seals in the moisture. Put your peaches into the crust, try to arrange them so the rounded part goes outward and they're all laying flat instead of just one giant pile. This also helps with not having a soggy bottom. Put that in the freezer for ten minutes while you roll out the other half of the crust. Once you have that rolled out, carefully place it over the top of the pie and completely seal the two halves of the crust together by crimping it with your fingers. You can then design it however you'd like, but make sure you have a slit at the top of your pie because peaches have a high water content and you need a way for the steam to escape otherwise your pie might literally explode and that's a mess you don't want to clean up. Brush your egg wash on top of your pie and cover the edges of the crust with tin foil so it doesn't burn. Bake for 40-50 minutes, mine took closer to 50 for it to be that beautiful golden brown. Eat with ice cream or your personal mug cake :)
- Dessert for One Please
Hello y'all! I told you there would be more recipes!! Have you ever been at home late at night so everything is closed and you're tired but you also REALLY want something sweet? Yeah me too it's an every night thing. Okay so mug cakes are known to be absolutely disgusting and rubbery and gross but I did have one good one once so I wanted to recreate that. It took four nights and three of them had me making faces and asking myself what went wrong. Eventually, I figured out you definitely shouldn't put egg in there because if you think about it, one cake for ten people requires three eggs so to get the right amount of egg for one person you'd have to divide one egg and that's hard. I also learned that the best mug cakes are chocolate because you can make them gooey and delicious so that's what I'm about to teach you. Gone are the days of rubbery dry mug cakes. You're welcome. TMADJJ Chocolate Gooey Mug Cake Ingredients 1/4 cup flour 1/4 cup caster sugar 1/4 milk 3 tbs cocoa powder, unsweetened 2 marshmallows 1/2 tsp vanilla extract 1/4 cup chocolate chips 1/4 cup unsalted butter, melted pinch of salt Recipe: Combine the butter, sugar, flour, cocoa powder, and vanilla extract. Mix well and then add the milk and salt. Stir in the chocolate chips and then place the marshmallows in the centre of the batter. Microwave for 1.5 minutes, stir the marshmallows down, and microwave for another 30 seconds. Finally, stir it again and you're ready to start that netflix show with your own little cake.
- Care for an Eclair?
Howdy readers, It's been a hot minute since I've written anything and it's not for lack of baking. I've just been super lazy which I'm sure you can relate to. So a couple of weeks ago was my best friend's dad's birthday and I asked her what he liked and turns out he's a big pastry guy! This was very exciting for me because I rarely get a chance to work on my pastry skills and I decided I was gonna make him eclairs. I feel a lot of people are intimidated by eclairs but they're honestly not hard they just take forever because there are so many steps. I'll also be posting two other things in quick succession so if eclairs aren't your thing, worry not, we'll find something for you to bake. But if you do decide to make these, I promise everyone at the zoom party you're going to will be very jealous they can't have one. Love from my flour covered self, TMADJJ P.S. get a whole shit tonne of eggs Creme Patissiere Ingredients: 7 egg yolks 75 g caster sugar 25 g plain flour (optional) 4 tsp cornstarch 500 ml milk 1 tsp vanilla extract Recipe: Okay so if you know how to make creme pat, you're basically doing that. Here are the steps if you're new to this and don't know what on earth I mean by that. You're going to have two bowls out for this, but the second you won't need until later. Start with whisking the yolks and granulated sugar together until they become lighter in colour and then add your flour and cornstarch. Technically you don't need the flour, but it does help the custard stiffen and stay stiff so I would use it. If you don't want to use the flour, just add it a smidge more cornstarch and you're golden ponyboy. READ THIS NEXT PART IN ITS ENTIRETY BEFORE CONTINUING BECAUSE YOU GOTTA GO FAST In a small saucepan, heat the milk and vanilla to just boiling and pour the hot mixture into the eggy bowl whisk while you pour, bring it all together and pour it back into the pot. Replace it on the burner and whisk continuously until it thickens and almost makes a labec (basically it holds its shape on a ladle). Take it off the heat and transfer it to a clean bowl fairly quickly because you don't want the eggs to scramble in the heat. Place clingfilm over the top and have it touching the custard so it doesn't form a skin. Leave it to cool at room temperature and then stick it in the fridge for a couple of hours to set completely. Eclairs Ingredients: 100 g butter 125 g plain flour 4 eggs 1 pinch of salt Recipe: Start by preheating the oven to 390 Farenheit. In a sauce pan, bring the butter with 250 mL of water and a pinch of salt to a boil. Remove the pan from the heat and incorporate your flour. Return to the heat and cook out the flour until the dough in the pot is cohesive and pulls easily away from the sides of the pot. It should all be kinda travellling together. Add in the eggs one by one mixing well between each one, it should look like glossy play doh. Transfer this all to a pastry bag without a tip and pipe it onto cookie sheets lined with parchment paper. Make the lines roughly 5 inches long and 1.5 inches wide. Bake for 15 ish minutes until golden brown and allow them to cool completely (an hour ish) before piping in the custard mixture. Melt some semisweet chocolate chips and dip the tops of the eclairs into it and serve :) keep them refrigerated after making them though.
- Mother's Day Dinner When You Can't Go Out
Readers, It's a weird time we're living in where some things have opened back up again but should we really be going out? If you're anything like my family, we're still staying in, which can be a little upsetting on mother's day when we'd usually go out to celebrate our wonderful moms. I had a bit of a difficult time figuring out what I was going to do for my awesome mom, given that I couldn't think of anything she'd want that I could buy and we couldn't take her out but then my best friend gave me the idea to make her dinner. And you know what? It's kinda perfect because you can make a meal that she'd enjoy, she can relax, and you can spend a few hours not binging netflix. I know this isn't necessarily baking, but in the spirit of everything being strange right now, I'm going to show you guys a recipe for homemade rosemary pasta and a killer marinara sauce that really only takes an hour or less to make. Happy mother's day to everyone out there!! TMADJJ Rosemary Tagiatelli Yields: Enough for 4 Ingredients 400 grams all purpose or 00 flour 4 eggs 2 ish sprigs of rosemary, finely chopped *Here's the thing: it's 1 egg per 100 grams of flour per person. so go up or go down as you need. Recipe In a bowl, pour all of your flour and create a well in the middle so it kinda looks like a volcano. Crack in your eggs and using a fork, slowly mix in the flour until it has just come together. Dump it out onto a workspace and begin kneading it until it's soft and a playdoh-y consistency. This can take up to 10 minutes, don't worry if it looks dry, it will come together I promise. If you have kneaded it for 15 minutes and it's not fully combined yet, then you can add a tablespoon of olive oil. You don't want it to be moist at all really because in the next step it regains a lot of it's moisture. Once you've kneaded it, cover it in cling film and leave it for half an hour while you work on your sauce. When half an hour has passed, cut it into fourths and roll each one out into a thin rectangle on a floured work surface. Whatever dough you're not using, cover with a clean towel, oxygen is your nemesis. When I say thin, I mean you want to be able to see the shadow of your fingers through it. Roll that up loosely into a log shape and then cut it in half inch slices. When you unravel it, it should be a long piece of noodle. Leave that to sit while you boil water. Fill a large pot to 2/3 full with water and add a good amount of salt so it almost is like you're cooking with seawater. Bring it to a boil and then add your pasta and cook it for two minutes before removing the pasta from the water. Serve with your sauce! *If you don't want to cook the pasta right away, you can dry it out in the air for a few days and then put in a ziplock bag and use it within a week. Marinara Ingredients large can of diced tomatoes half an onion clove of garlic three cloves of rosemary, chopped tablespoon of honey 1/4 cup heavy cream (optional) black pepper salt oregano Recipe This is basically all a dump it in a pot on low and let it simmer for an hour. Do what feels right in your heart.
- An Inside Out Boston Creme Pie Cake
Good morning reader(s)! Yesterday, the feeling of incredible boredom grew to a point where I couldn't handle it anymore, leading me to youtube and the bon appetit channel. After watching Brad and Claire make doughnuts and pie, I got an urge to bake and I turned to one of my favourite families and decided to make something for them. Now, anyone who knows me knows that I love making eclairs but I simply didn't have time to make those so I thought of something else that has that creme patisserie filling, boston creme pie. I was in a mood to work on my piping skills so it became a cake instead. So as I'm halfway through making batter, I remembered that I don't like to follow rules and decided to make it inside out, so the creme is on the outside and chocolate on the inside. I wanted to redeem myself for the last cake I made which was tasty, albeit very ugly, so this cake took an hour and a half to bake because I only had one silicone pan and I wasn't about to play myself with the metal pans again. And I was excited when I went to make a buttercream out of the creme patisserie only to learn that that's just a regular German buttercream! I like this frosting recipe a lot because it's not mega sweet and therefore complements the rich ganache beautifully. Honestly, there's not much of a story here because it all went pretty well! I'm just going to get to the recipe bit now, if you remember the cake recipe from the melting cake extravaganza, that's the one we're going to use, if not, I will add it in here so donut worry :) Love from me and my mom who is looking over my shoulder, TMADJJ P.S. I'm listing all of the recipes in order that it needs to be done and then putting the assembling steps at the bottom. Cake Yields three 10in rounds Ingredients 4.5 sticks salted butter 3.5 cups sugar 6 egg whites (save the yolks, you'll need it later) 4.5 tsp vanilla extract 4.5 cups flour 1/2 tsp baking soda 4 1/4 tsp baking powder 2 3/4 cups whole milk Recipe Preheat the oven to 350. LINE YOUR PANS PEOPLE or use silicone pans either one works but these yeilded three 10 inch layers. Beat the butter and sugar together until its a lil mushy and fluffy. Add the egg whites and vanilla for about a minute, it will look kinda curdled but that's fine and correct. In a separate bowl, combine flour, baking soda and baking powder. Add 1/3 of the dry mix to the original batter and alternate adding the dry mix and the milk until it runs out. I did three additions of dry mix and two of the milk. The batter should now look glossy and thicc, if it still looks curdled then you've probably messed up somehow. Divide the batter evenly between the pans and then stagger the pans in the oven so they're not overlapping. If they have to overlap, then try and do it so they do so in the least way possible. I baked my cakes for about 30 minutes, so I'd check it after that long, but keep baking until a toothpick comes out clean and the tops look golden brown. Cool it for ten minutes before attempting to remove them from the pans and relocating them to a cooling rack. If you don't have a cooling rack don't be alarmed, I don't either, I just put them on another flat surface because that feels vaguely more professional than leaving them in the pans. What I did was put them in the fridge immediately after taking them out of the oven, left them for 15 minutes, and then removed the cake from the pan to a cooling rack. Let them cool completely before you try to ice them. Creme Patisserie Buttercream Yields enough to fully frost the cake Ingredients 6 egg yolks (aren't you glad you didn't throw those away) 7 tbs granulated sugar 3 tbs all purpose flour (you don't really need this, I'll explain in a minute) 3 tbs cornstarch 2.5 cups milk 1.5 tsp vanilla 2.5 sticks of butter, softened half a cup of powdered sugar, you can add more if your sweet tooth isn't satisfied Recipe Okay so if you know how to make creme pat, you're basically doing that and then spooning that in to the butter at the end. Here are the steps if you're new to this and don't know what on earth I mean by that. You're going to have two bowls out for this, but the second you won't need until later. Start with whisking the yolks and granulated sugar together until they become lighter in colour and then add your flour and cornstarch. Technically you don't need the flour, but it does help the custard stiffen and stay stiff so I would use it. If you don't have it or used the rest of it for the cake, just add it a smidge more cornstarch and you're golden ponyboy. READ THIS NEXT PART IN ITS ENTIRETY BEFORE CONTINUING BECAUSE YOU GOTTA GO FAST In a small saucepan, heat the milk and vanilla to just boiling and pour the hot mixture into the eggy bowl whisk while you pour, bring it all together and pour it back into the pot. Replace it on the burner and whisk continuously until it thickens and almost makes a labec (basically it holds its shape on a ladle). Take it off the heat and transfer it to a clean bowl fairly quickly because you don't want the eggs to scramble in the heat. Place clingfilm over the top and have it touching the custard so it doesn't form a skin. Leave it to cool at room temperature and then stick it in the fridge for a couple of hours to set completely. Skip down to the ganache recipe now. Once it has set, take out another bowl and the softened butter, and whip the butter until light and fluffy. Add in the cold custard two to three tablespoons at a time and mix completely before adding in more. When all the custard is incorporated, add in that tiny bit of powdered sugar to make it stiffer and just a tidge sweeter. Put it back in the fridge while you work on the next part of assembling. Also, I know that it's a little yellower than the other buttercreams we've made, which is perfect for that boston creme pie look, but if you want to make it for another cake, you can put in food colouring to make it look a little different. Unfortunately, the yellow colour comes from the egg yolks so we can't really get rid of that. Chocolate Ganache Yields enough to assemble and drip baby Ingredients 1.5 ish cups of semisweet choccy chips 1 ish cup of heavy cream a pat of butter Recipe Okay you're hopefully done with the creme pat. Heat the heavy cream and butter in a saucepan until nice and toasty, don't burn it, and pour it over the chocolate. Let it sit for 5 minutes before stirring it all so it's melty and shiny and beautiful. Now go back up to the creme pat. ASSEMBLY Y'all can do whatever decorating you want, but I did a drip cake which I'll tell you how to do or you can ignore me and do your own creative thing. The basics though, are these. Make sure all of your cake layers are flat, you might have to cut off the tops of them with a knife, but save your scraps because you can form them into little balls and eat them with the left over frosting. Put a little bit of the buttercream on the surface of whatever is under your cake so it doesn't move while you're decorating. Put your first layer down and cover it with the chocolate ganache, but only the top. Try your best not to get any on the sides. Do the same with the second layer and then set the ganache aside. Put your last layer on and add a crumb coat of the buttercream all around the sides and top of the cake. A crumbcoat makes sure that there's no little bits of cake at the final stage of frosting, helps keep it pretty. You can fridge it at this step for a half hour if you'd like, but if you don't have time, it's not super necessary. After that, pipe a spiral that goes up and around the entire cake with the buttercream in a piping bag without a tip. Smooth all of this with either a spatula or a bench scraper. Have your ganache in a bag with a small rounded tip, I have a kootek piping kit and used the K01 tip. This is where it gets a little tricky to follow so if you don't want these exact decorations, you can do your own thing now. For the drip effect, pipe roughly a bean sized amount on the side of the top of your cake. It should be loose enough that it kinda drips down. You're going to do this around the entire cake top, and connect those dots with a smooth line of ganche around the edge of the top of your cake. You're done with your ganache now so you can put that away. Your buttercream is going to go in a piping bag with a star tip, I used a K35 tip. Just pipe little swirls around the edge of the top of the cake, right on top of the ganache. After that, feel free to shave some chocolate over the swirls or add more ganache or whatever your little heart feels like and then it's done!!
- Cinnamon Twists to Woo a Boy
Dear me, No one is reading these so now I'm going to write to myself because that's basically what this is anyway. I wanted to learn how to make something that I know my boyfriend likes and going wayyyy back into my memory I remembered me bringing cinnamon rolls to school in ninth grade because Lucie said he liked them. Today I decided to try and make some from scratch with a little help from my friends over at sortedfood. I say that like we've met (we haven't), but I consider them friends nonetheless. It was a most of the day process, with three hours dedicated to proving alone, and an extra one for all the hands on stuff. Folks, cinnamon rolls aren't tricky, they're just a bit different from other baked goods because they're a yeast based dough. I have full confidence in all of you (even if that is just future me I'm talking to) that you can do this and kick ass at it. And it's a fairly large recipe so if you can't them all in one sitting then wrap them up and chuck them in the microwave the next morning for half a minute and they'll be just as delicious. Hugs and love from six feet away, TMADJJ Cinnamon twists: Yields roughly 12-15 twists Ingredients for the dough 500 g plain flour 2 tsp dry yeast 75 g soft brown sugar 200 ml milk 2 large eggs 75 g softened butter For the filling like two cups of brown sugar a few tablespoons of cinnamon half as much nutmeg and cloves a baby bit of cardamom 60 g melted butter Recipe: Heat the milk in a microwave save dish for 30 seconds and add the yeast and a pinch of sugar to that and stir. Set that aside and in a separate bowl mix all the other ingredients. Add in the yeasty milk and stir until it's entirely combined. Next, you're going to knead the dough until there's a smooth finish on the top and it's relatively stretchy. Fold it in on itself to create a ball, set it in a bowl, cover in cling film, and leave to prove in a warm place for two hours. After it's proved, dust a clean work surface with flour and pour your bread ball on it. Using a rolling pin, shape it into a rectangle, making sure that the dough is pretty thin. In a bowl, combine all of the filling ingredients except the butter and mix completely. Use a pastry brush to cover the dough rectangle in a layer of melted butter and sprinkle the spice mixture over the top of it. You're then going to fold it hotdog style, making sure that all of the ends meet and gently press them together. I went over the whole thing with the rolling pin one more time, but if you do this, be careful not to press hard. If you're looking at it where the long edge is horizontal, you're going to cut 1.5 inch vertical strips all the way down the rectangle. If you have pieces that are kinda small, don't worry, you can make these into little bites at the end. Next, take your strips and cut a slit in the middle of them, but stop 3 cm before you hit either end. Pick a strip up and twist it, holding one end in two fingers on one hand and wrap the other end around the fingers, but not too tightly. When you get to the other end, tuck it in the whole in the middle of your two fingers and place it on a baking sheet covered in parchment paper. Do this with all of the strips and the baby bits that couldn't be made into strips just kinda twist and tuck. Cover with cling film and leave for another hour. Alright ladies and gents we're almost there. Preheat your oven to 160° Farenheit and creat an egg wash made of egg and a splash of water. Paint that on all of your knots. Bake the knots for roughly 20 minutes and cover with icing almost immediately out of the oven. Icing: Ingredients: 2 cups icing sugar 2 tbs milk 2 tbs melted butter 1 tsp vanilla Recipe: Put all of it together in a bowl, stir, and spread in a thin layer over your twists.
- Brian Barone (my italian teacher) Is My Seratonin Dealer
What is up y'all! I'm tired of everything and I have no energy whatsoever ESPECIALLY since UF has decided to deny me entrance yet again. There are only two upsides to this decision of theirs and they are as follows: 1. I get to room with one of my best friends next year and 2. I get to keep Brian Barone as my Italian teacher. For all of you who don't know who that is, he's a lovely man who has three cats and routinely makes millenial jokes in the middle of class. It is his Italian project and my best friend Oliva who brought me happiness during the UF debacle. So Brian came to the conclusion that for our final project in Italian one, we should make a cultural video on anything we want, so long as it at least somewhat has to do with Italy. Of course my mind immediately went to the delicious desserts of Italy and I figured why not make tiramisu. So after finding out about UF, I threw myself into being overdramatic and what better way than to make a dessert pretending you're an Italian movie star in a silent film? I spent about five hours making this whole dessert and filming it for my project and before you ask, no, I didn't get any of my great fake Italian acting on video because that's just embarrassing. My point is, my boy Brian Barone helped me in an hour of need by assigning me a project where I had an excuse to bake and I will be forever in his debt because of it. I have attatched the video to this page but be warned, it is all in really bad Italian so it most likely won't make sense. In light of this, there is also the usual written recipe in English and actually part of it was translated from a German one my mother had so we're going trilingual today baby! Un sacco d'amore/viele Leibe/lots of love, TMADJJ Okay so there are two parts to this, the ladyfingers and the actual tiramisu bit so if you already have ladyfingers scroll on down to door two. Ladyfingers: Yields: enough for two layers in a 13x9in pan 3 eggs and an extra egg white 115g sugar 1/2 tsp vanilla 142g all purpose flour Recipe: Preheat oven to 375. So first separate your egg yolks and whites in to two separate bowls and make the yolks go in a bigger one. Whip the yolks with 1/2 of the sugar and add in the vanilla. Whip the egg whites and remaining sugar until they're stiff and gently fold them into the egg yolk mix. Sift the flour over the batter and incorporate fully. Line two cookie sheets with either parchment paper or silicone mats and spoon the batter into a piping bag without a tip in it. Pipe lines of 2 inch thick and 3 inch long cookies, you can put them relatively close together because they don't spread out that much when baking. Bake them for about 15 minutes or until golden brown. Don't use these cookies if they're still soft, you have to let them cool completely before making the tiramisu and if you leave them in an uncovered container they should become that nice crunchy consistency. Tiramisu: Yields: fills a 9x13 glass pan, 3 inches deep 500g of mascarpone (publix has a 2 for 1 sale rn!!) 100g powdered sugar 4 egg yolks 2 egg whites the ladyfingers from up above .68 fluid oz amaretto (I know the measurement is weird af but it was originally in centilitres and I felt this was the lesser of two evils ur welcome) some cocoa powder coffee/espresso Rezept: Start by beating the egg yolks and powdered sugar together and then add your amaretto. I know amaretto is spensive so if you don't have that you could also opt for chocolate liqueur and a splash of almond extract. Incorporate the mascarpone and I would suggest using an electric mixer for this otherwise it's a pain in the ass. In a separate bowl, beat your egg whites until they make stiff peaks and then carefully fold it in to the yolky stuff. In a glass pan (honestly it doesn't have to be glass, that's just for the aesthetic) lay out your lady fingers so it completely covers the pan and drizzle coffee or espresso over it so the cookies soak up the liquid. That's way one to do it, what I did was I put them all in a bag and put the coffee in with it which my mother then told me was wrong but who cares it still worked. Your next layer is going to be the cream so pour that over the cookies and completely cover them. After another layer of ladyfingers and cream you're almost finished! Sift the cocoa powder over the top layer and refrigerate for at least two hours before serving!
- A Crackhead Idea in the Form of Baked Goods
Hello Readers, First of all, there is a story that prefaces the honey vanilla cupcake with salted chocolate ganache recipe so if you'd like to know that, message me on your own time. I'm going insane but am no longer using baking as a coping technique for sadness but instead for boredom and as a reason to get out of the house. For anyone wondering, I have been self quarantining and social distancing and all the good stuff, and in the process have been talking a lot more with my friends via the snap of cats (snapchat). I miss them a lot so I decided that I was going to make an excuse to see at least some of them so I made these cupcakes. This post was going to be a lot longer and a lot stupider but my best friends told me I am not allowed to write that. Anyway, this has been a long story for a short outcome so thanks for listening to my shenanigans. Here's a half-assed but delicious recipe for your troubles :) smooches, TMADJJ Honey Vanilla Cupcakes Yields: 24 cupcakes Ingredients: 2 2/3 cups all purpose flour 3 tsp baking powder 1 cup softened unsalted butter 1 cup granulated sugar 1 cup brown sugar 2 eggs 1/2 cup sour cream or greek yogurt 1.5 cups milk 2 tbsp honey 2 tbsp vanilla extract Recipe: Preheat oven to 350 farenheit. Take the softened butter and beat it until it's light and fluffy, then add the sugar. Honestly, you can use just granulated sugar, but I think the brown sugar has that richness that granulated doesn't. Alternate adding the flour and milk and mix until fully combined. Add remaining ingredients and beat until smooth. Spoon batter into cupcake liners, make them about three quarters full and then bake for roughly 20 minutes or until golden brown. Leave to cool for 20-30 minutes before adding the ganache frosting. Salted Chocolate Ganache frosting Ingredients: 16 oz semisweet chocolate 1 1/2 tsp salt 8 oz heavy cream OR 1 stick of unsalted butter and 1 cup of 2% milk Recipe: Heat your heavy cream or butter/milk solution on the stove until it's simmering BUT DON'T LET IT BOIL BECAUSE IT WILL BURN. Once it's nice and toasty, pour it over your chocolate which I hope you had the sense to put into a bowl. Let it sit for a few minutes and then stir the chocolate until its all melty and shiny and pretty. Add your salt and let it sit until it's cooled enough to the point where it looks like it would hold it's shape on top of a cupcake. If it needs some help getting there, then stick it in the fridge for about 10 minutes and stir it again when it comes out. I used a star tip to pipe it on the cupcakes but you can use whatever your little heart desires to slap it on the baby cakes.